Regional overview
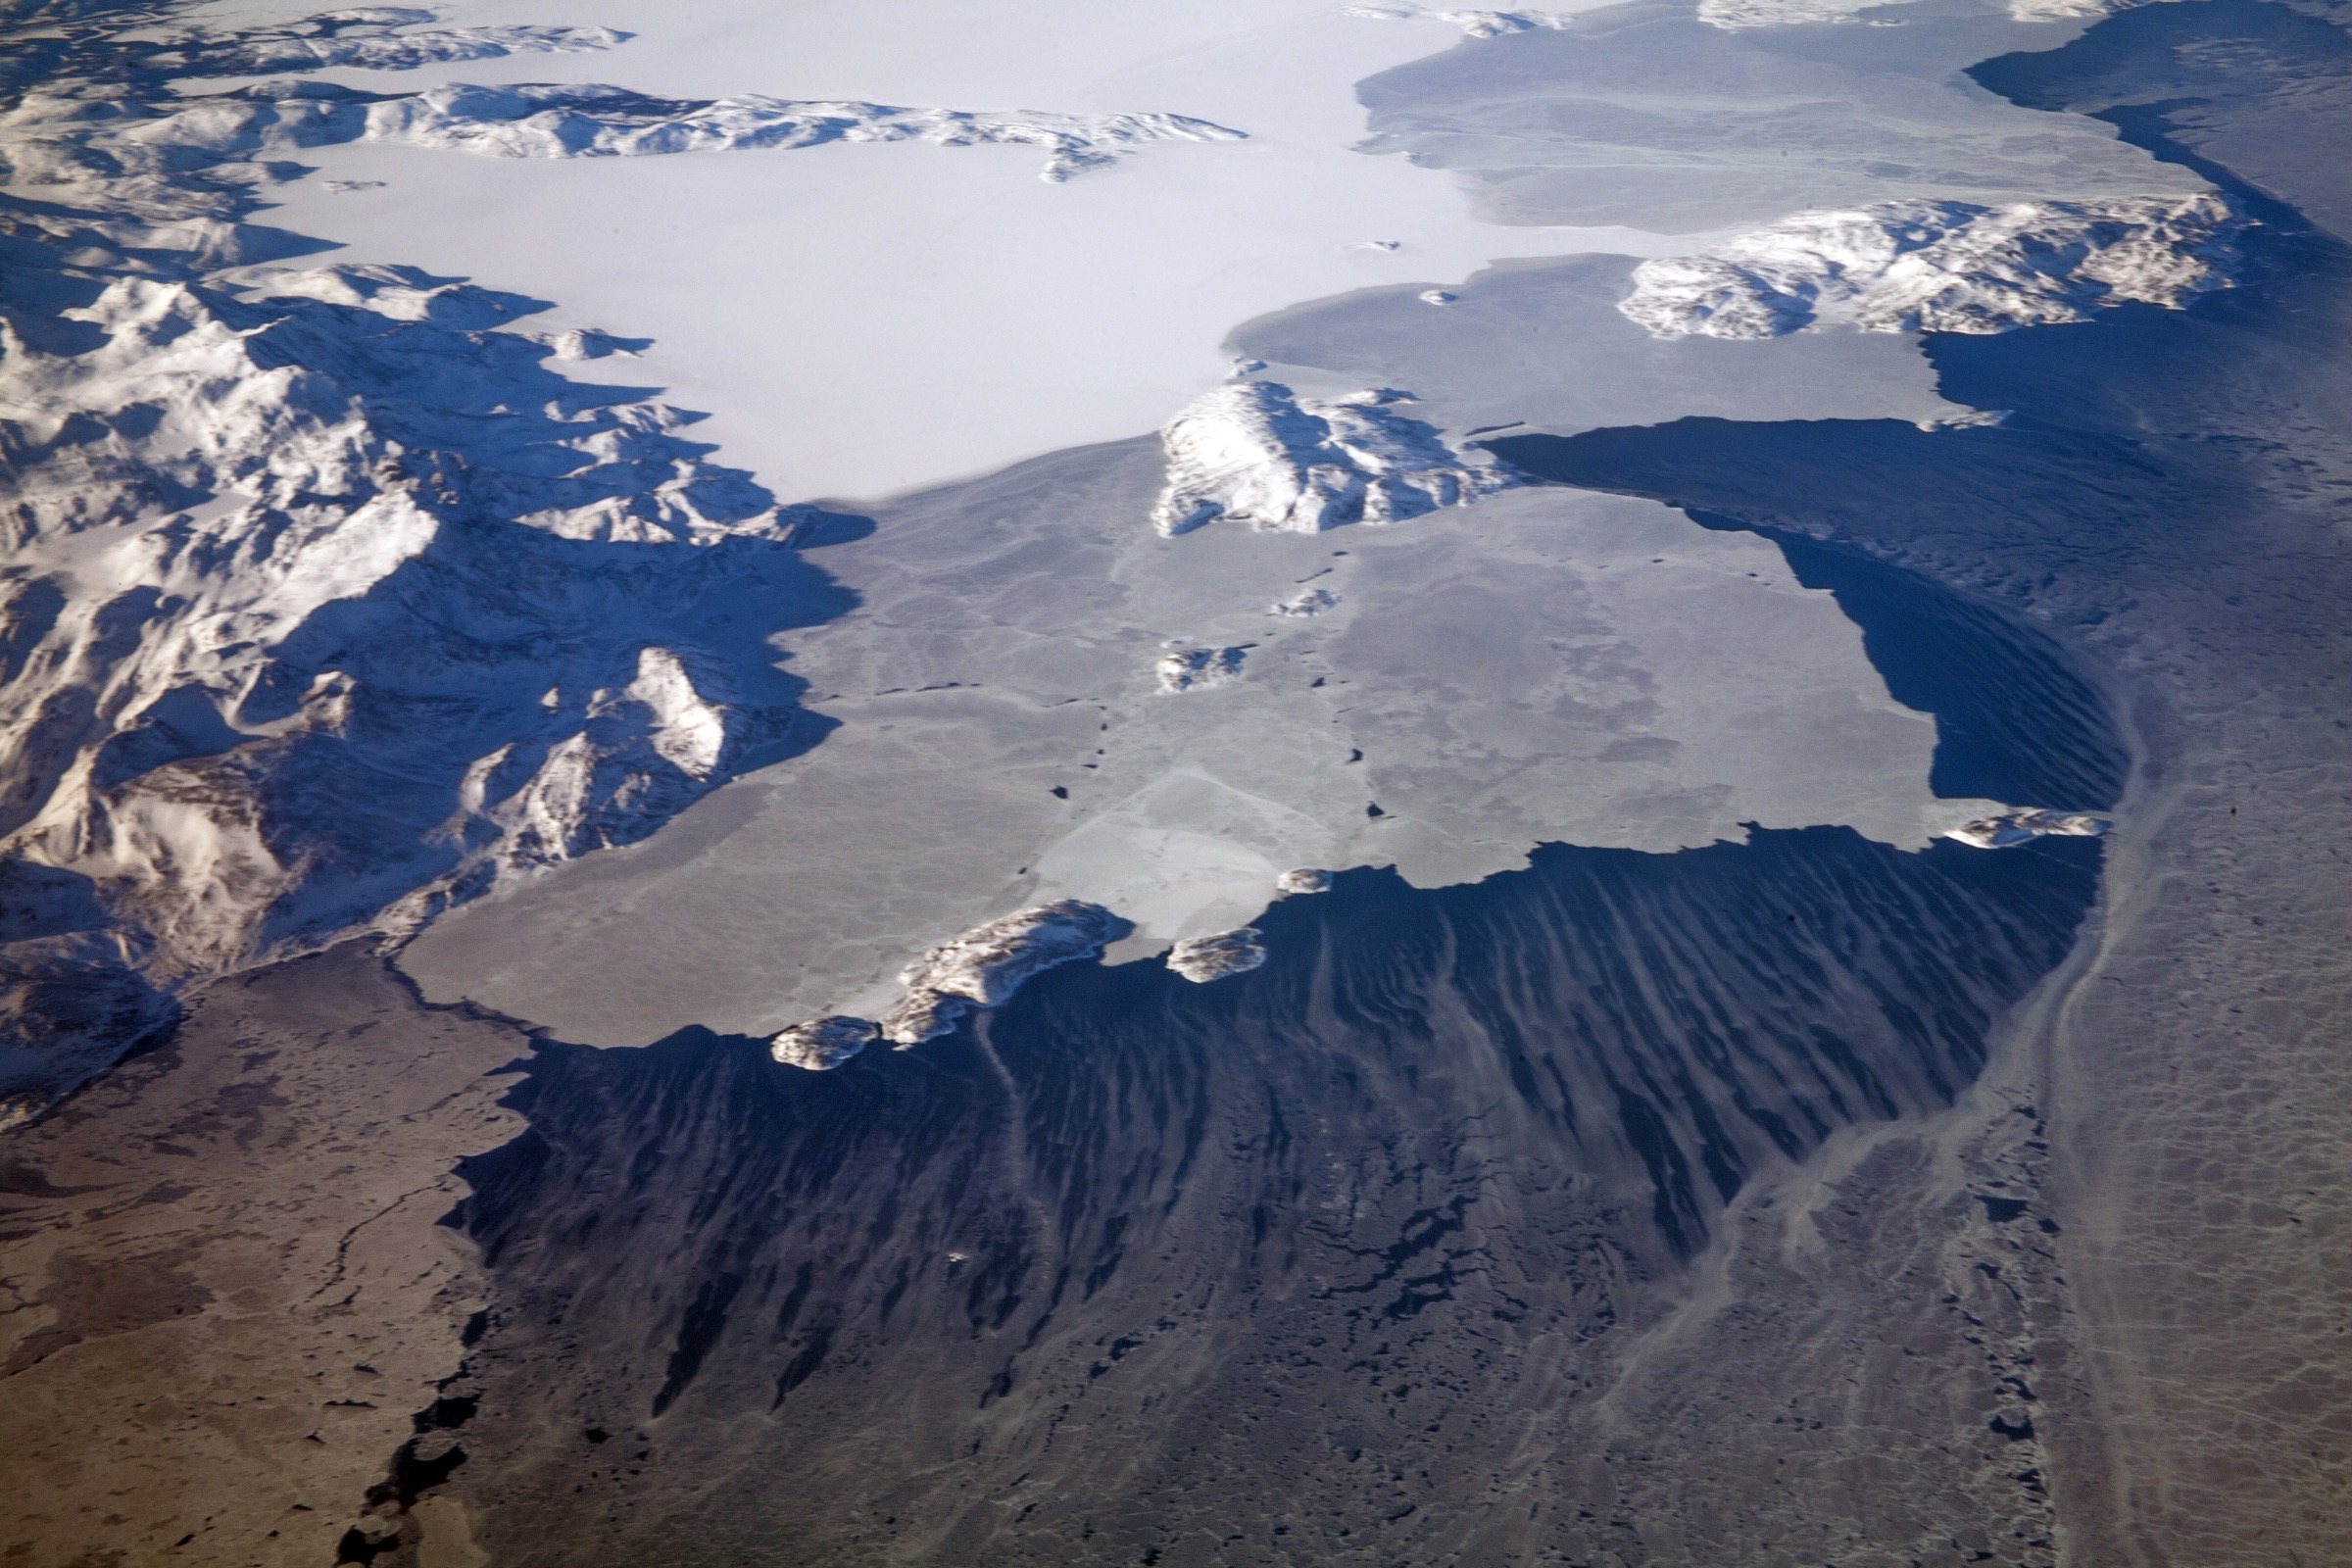
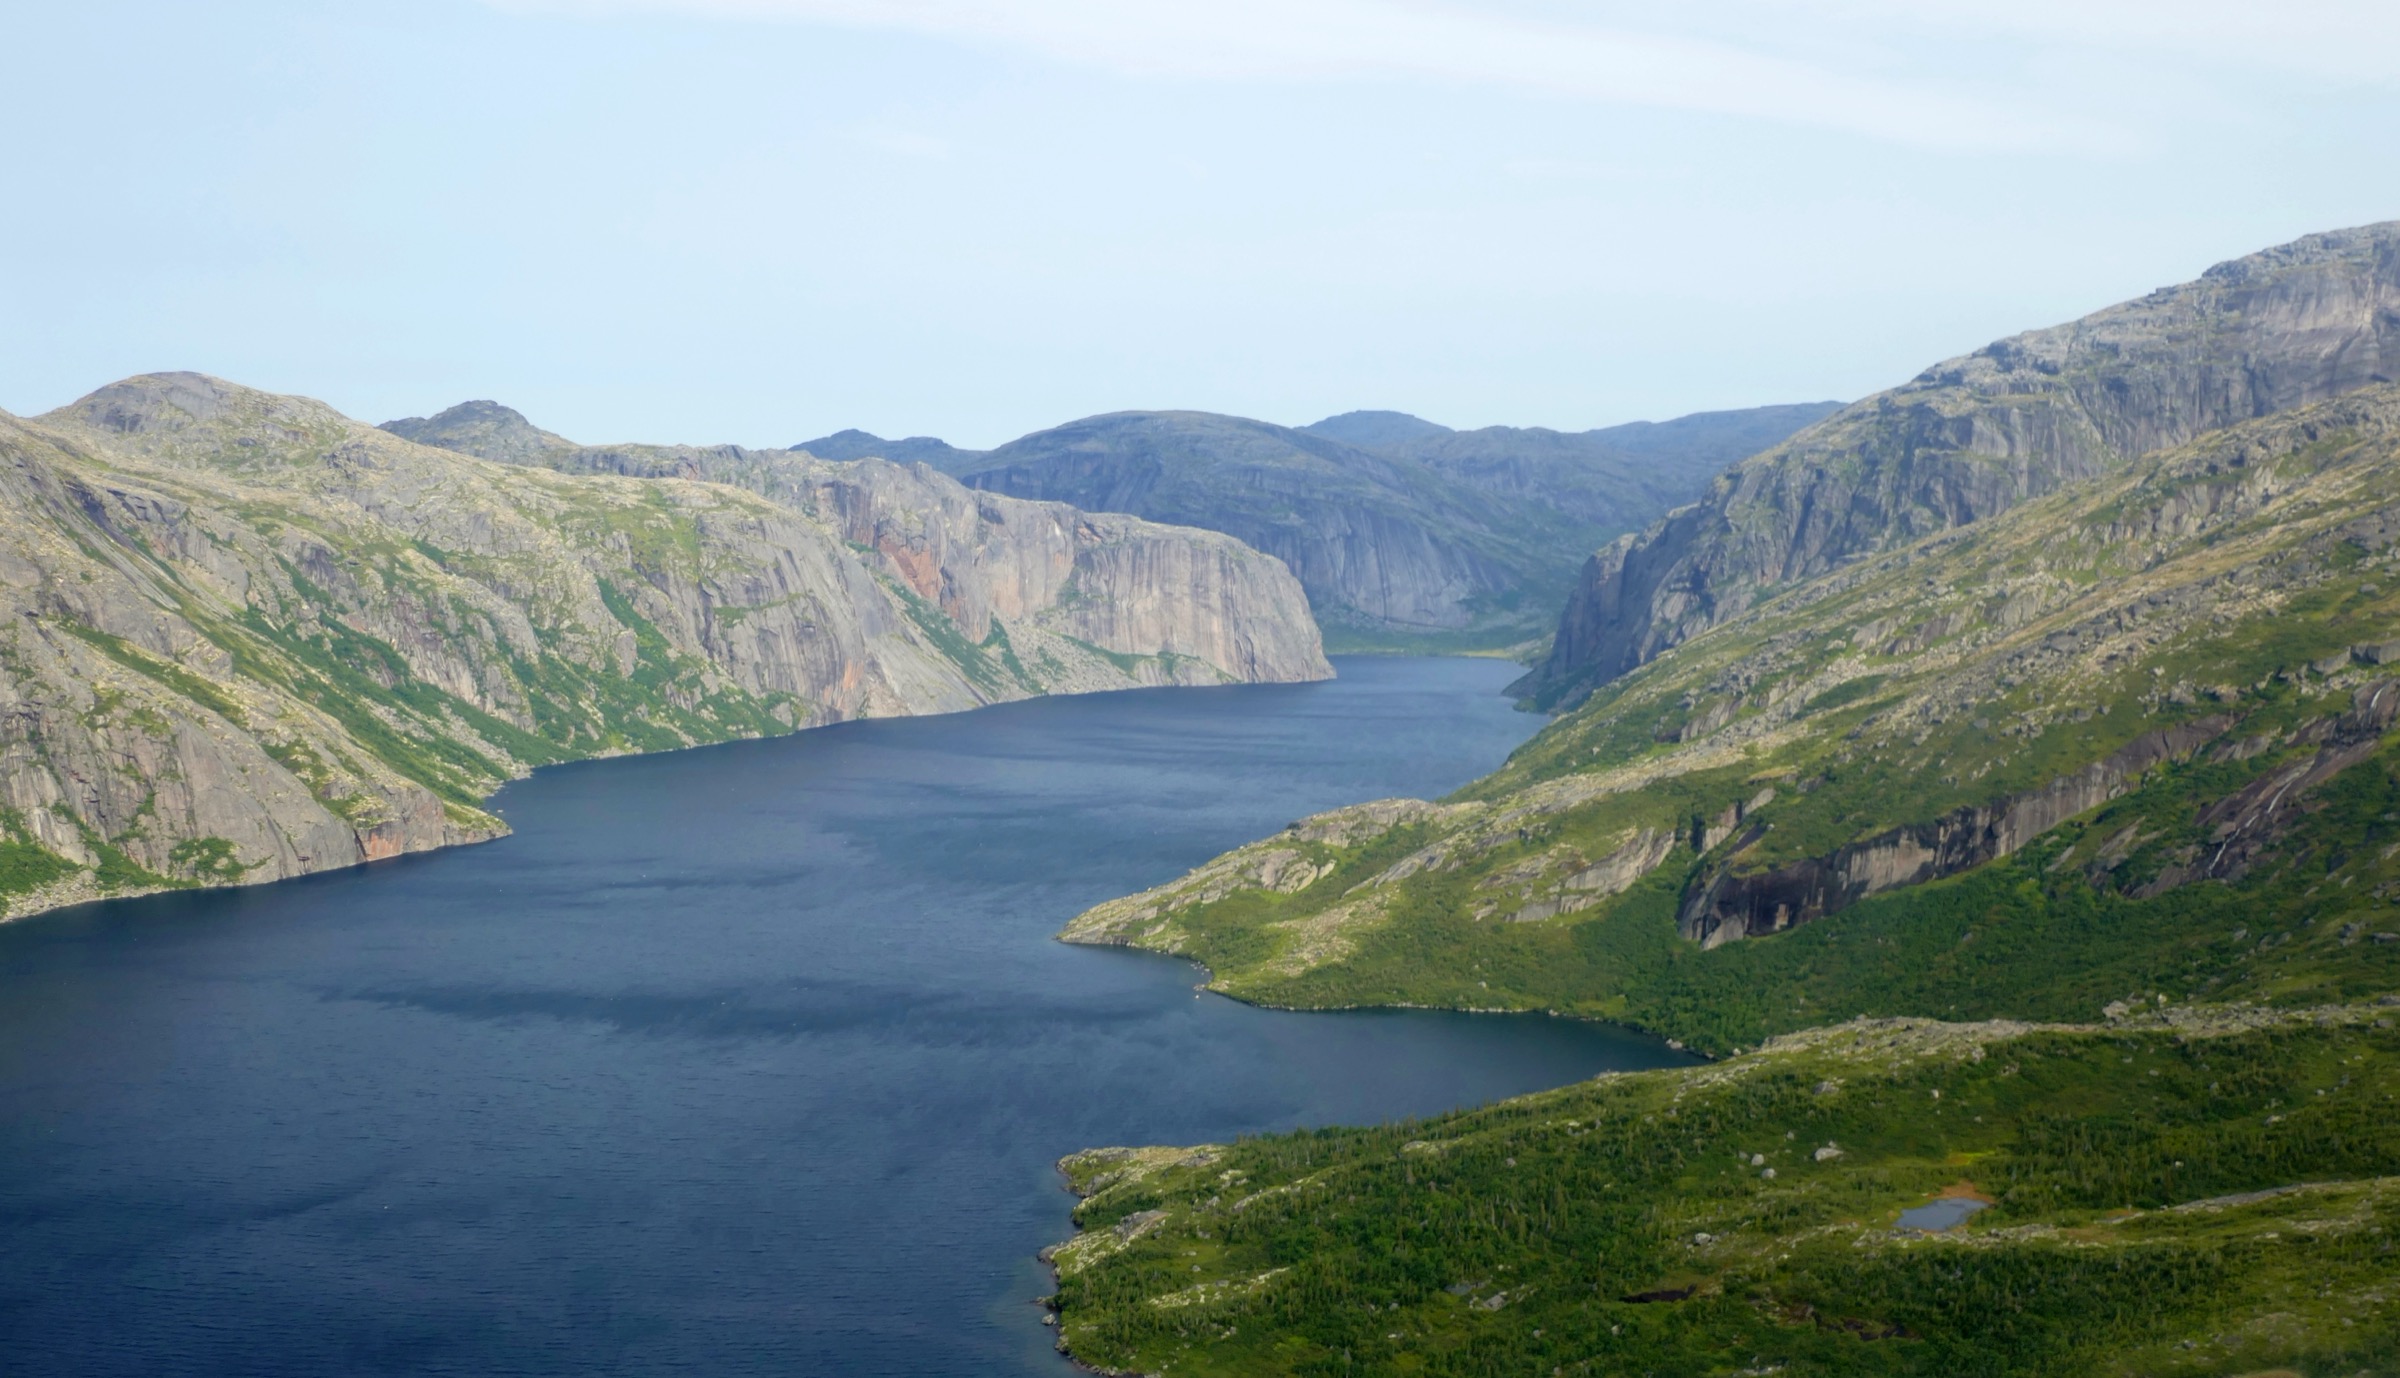
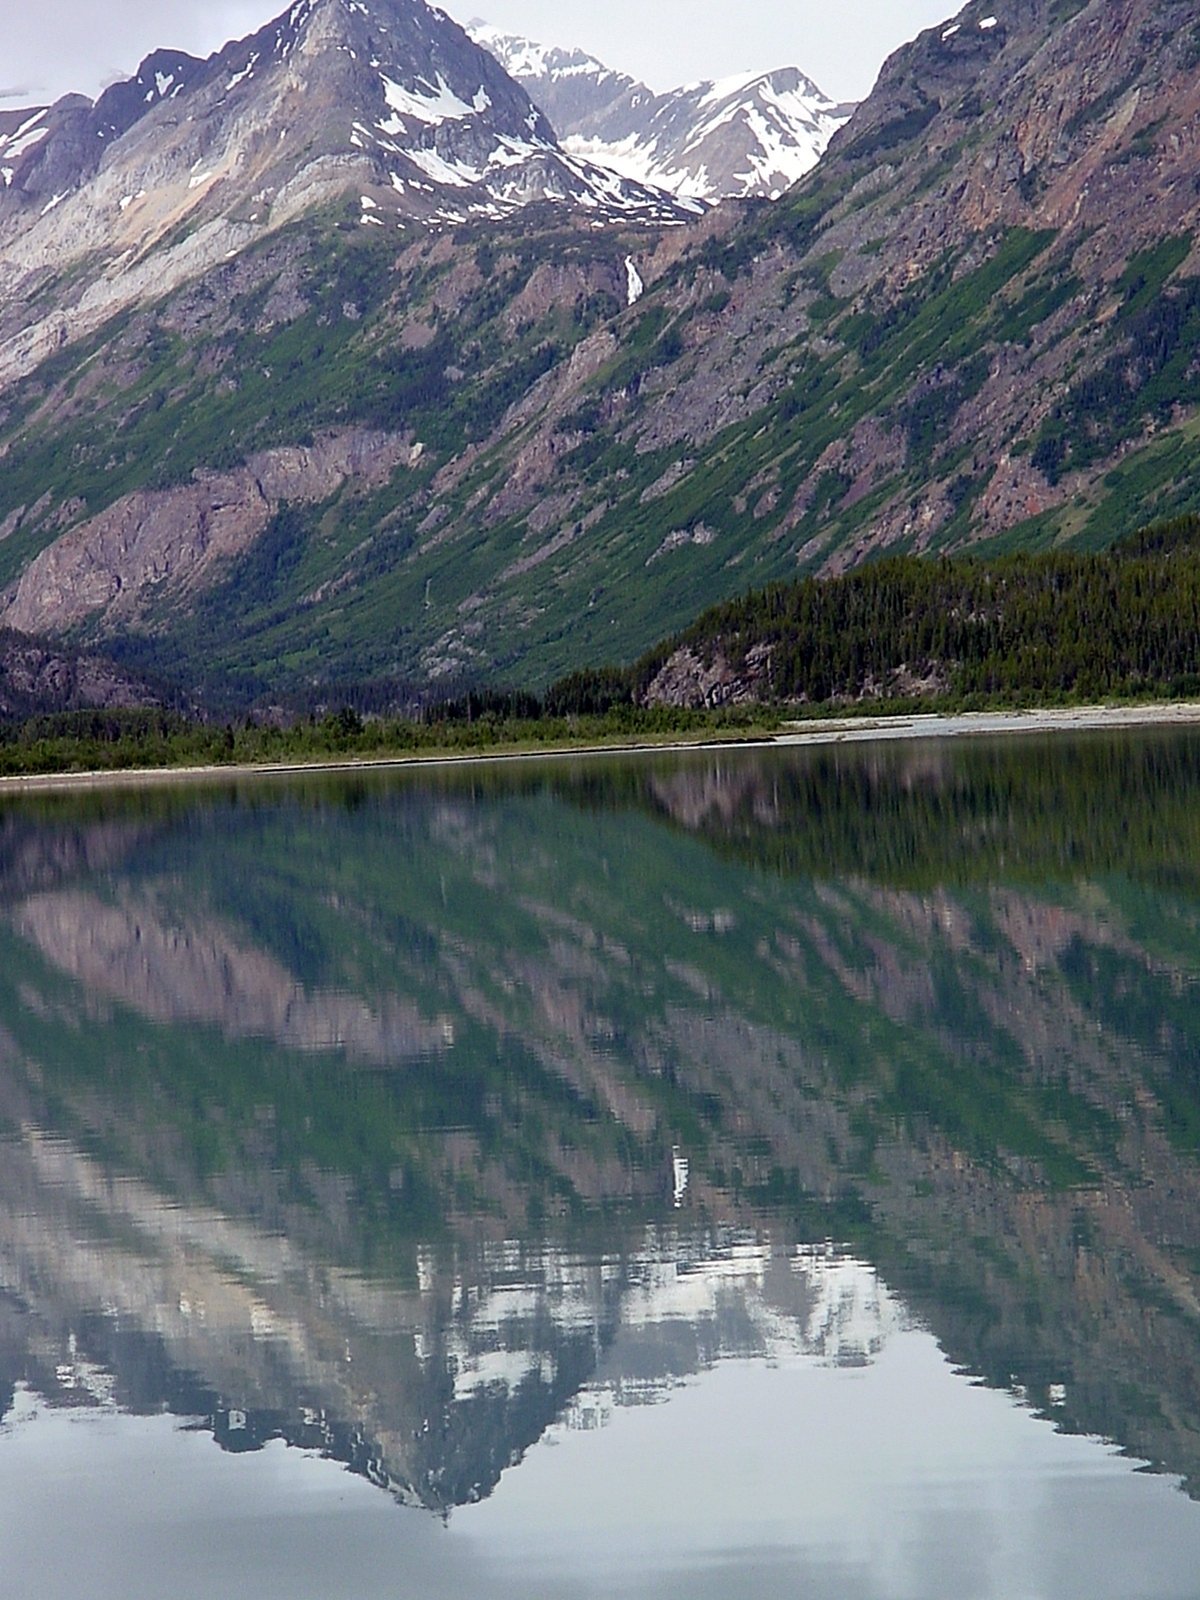
The Kaumajet Mountains are a compact, dramatic range on the northern Labrador coast, rising directly out of the Labrador Sea between Hebron Fiord to the north and Mugford Tickle to the south. The name comes from the Inuktitut Kaumajet, “shining mountains,” for the way the steep east faces catch first light. The range is part of the Arctic Cordillera mountain system and lies entirely within the Nunatsiavut self-governing region of Labrador. The signal peaks are Brave Mountain (1,300 m, the highest island peak on the Atlantic coast of North America between the Caribbean and Hudson Strait), Bishop’s Mitre (1,087 m, a narrow river-carved tower on Grimmington Island), and The Finger (1,006 m). The range sits at about 57°48′N 61°51′W, with most of its summits on Grimmington Island and the adjacent mainland between Seal Bight and Cod Bag Harbour.
There are no settlements, roads, marked trails or commercial accommodation anywhere in the Kaumajet. The closest year-round settlements are Hebron (abandoned mission, occasional summer base) about 30 km to the north and Nain (population ~1,200) about 200 km to the south. The standard expedition approach is to fly from Goose Bay to the Saglek airstrip (operated by the Department of National Defence at the south edge of Torngat Mountains National Park), continue by chartered boat or sea kayak south through Saglek Fjord and Hebron Fiord, and land on the Grimmington Island shore or on the mainland coast opposite. Air-charter operators in Goose Bay (Air Borealis, Universal Helicopters) and boat charters out of Nain serve the area on demand.
The walking window is very short. Pack ice often blocks the inshore zone into July, and autumn storms shut the coast from mid-September. The reliable expedition months are mid-July through early September. Even then, weather is volatile: dense sea-fog, sustained 40+ kt winds, and sub-zero overnight temperatures at altitude are all common. Polar bear activity continues year-round on the coast, and black bear are present in the lower valleys. Mobile coverage is non-existent everywhere except briefly near Saglek; satellite-messenger or HF radio is mandatory.
The Kaumajet are climbing rather than hiking terrain — most of the peaks involve technical rock or ice — but the lower slopes, fjord shores and inter-summit cols offer genuine day-walks for visitors already on the coast for a longer expedition. All five routes below are framed as candidate day-walks from shore landings; none has a published track or maintained route. Trip planning should be done with Parks Canada (for Saglek/Torngat overlap), the Nunatsiavut Government, and a qualified Labrador-coast guide.
Selection rationale
There are no established trails in the Kaumajet Mountains. The five walks below cover the most representative landscape types — the Saglek Fjord shore at the regional access point, a high-summit attempt on Grimmington Island, a col walk between two named peaks, a Hebron Fiord shore walk on the mainland side, and an outer-island viewpoint walk on Cod Island. All are described as candidate routes; specific tracks must be confirmed with a local guide and registered with the Nunatsiavut Government.
Summary table
| # | Hike | Country | Route type | Distance | Gain | Max elevation | Difficulty |
|---|---|---|---|---|---|---|---|
| 1 | Saglek Fjord south-shore walk | Canada | Linear / out-and-back | 6-12 km | ~200-400 m | ~400 m | Moderate |
| 2 | Brave Mountain summit attempt (Grimmington Island) | Canada | Out-and-back | 8-12 km | ~1,300 m | ~1,300 m | Strenuous / scramble |
| 3 | Bishop’s Mitre col walk | Canada | Out-and-back | 6-10 km | ~700-900 m | ~900 m | Strenuous |
| 4 | Hebron Fiord south-shore walk | Canada | Out-and-back | 8-12 km | ~200-400 m | ~400 m | Moderate |
| 5 | Cod Island peaks viewpoint walk | Canada | Out-and-back | 5-9 km | ~400-600 m | ~600 m | Moderate |
1. Saglek Fjord south-shore walk
Snapshot
Itinerary
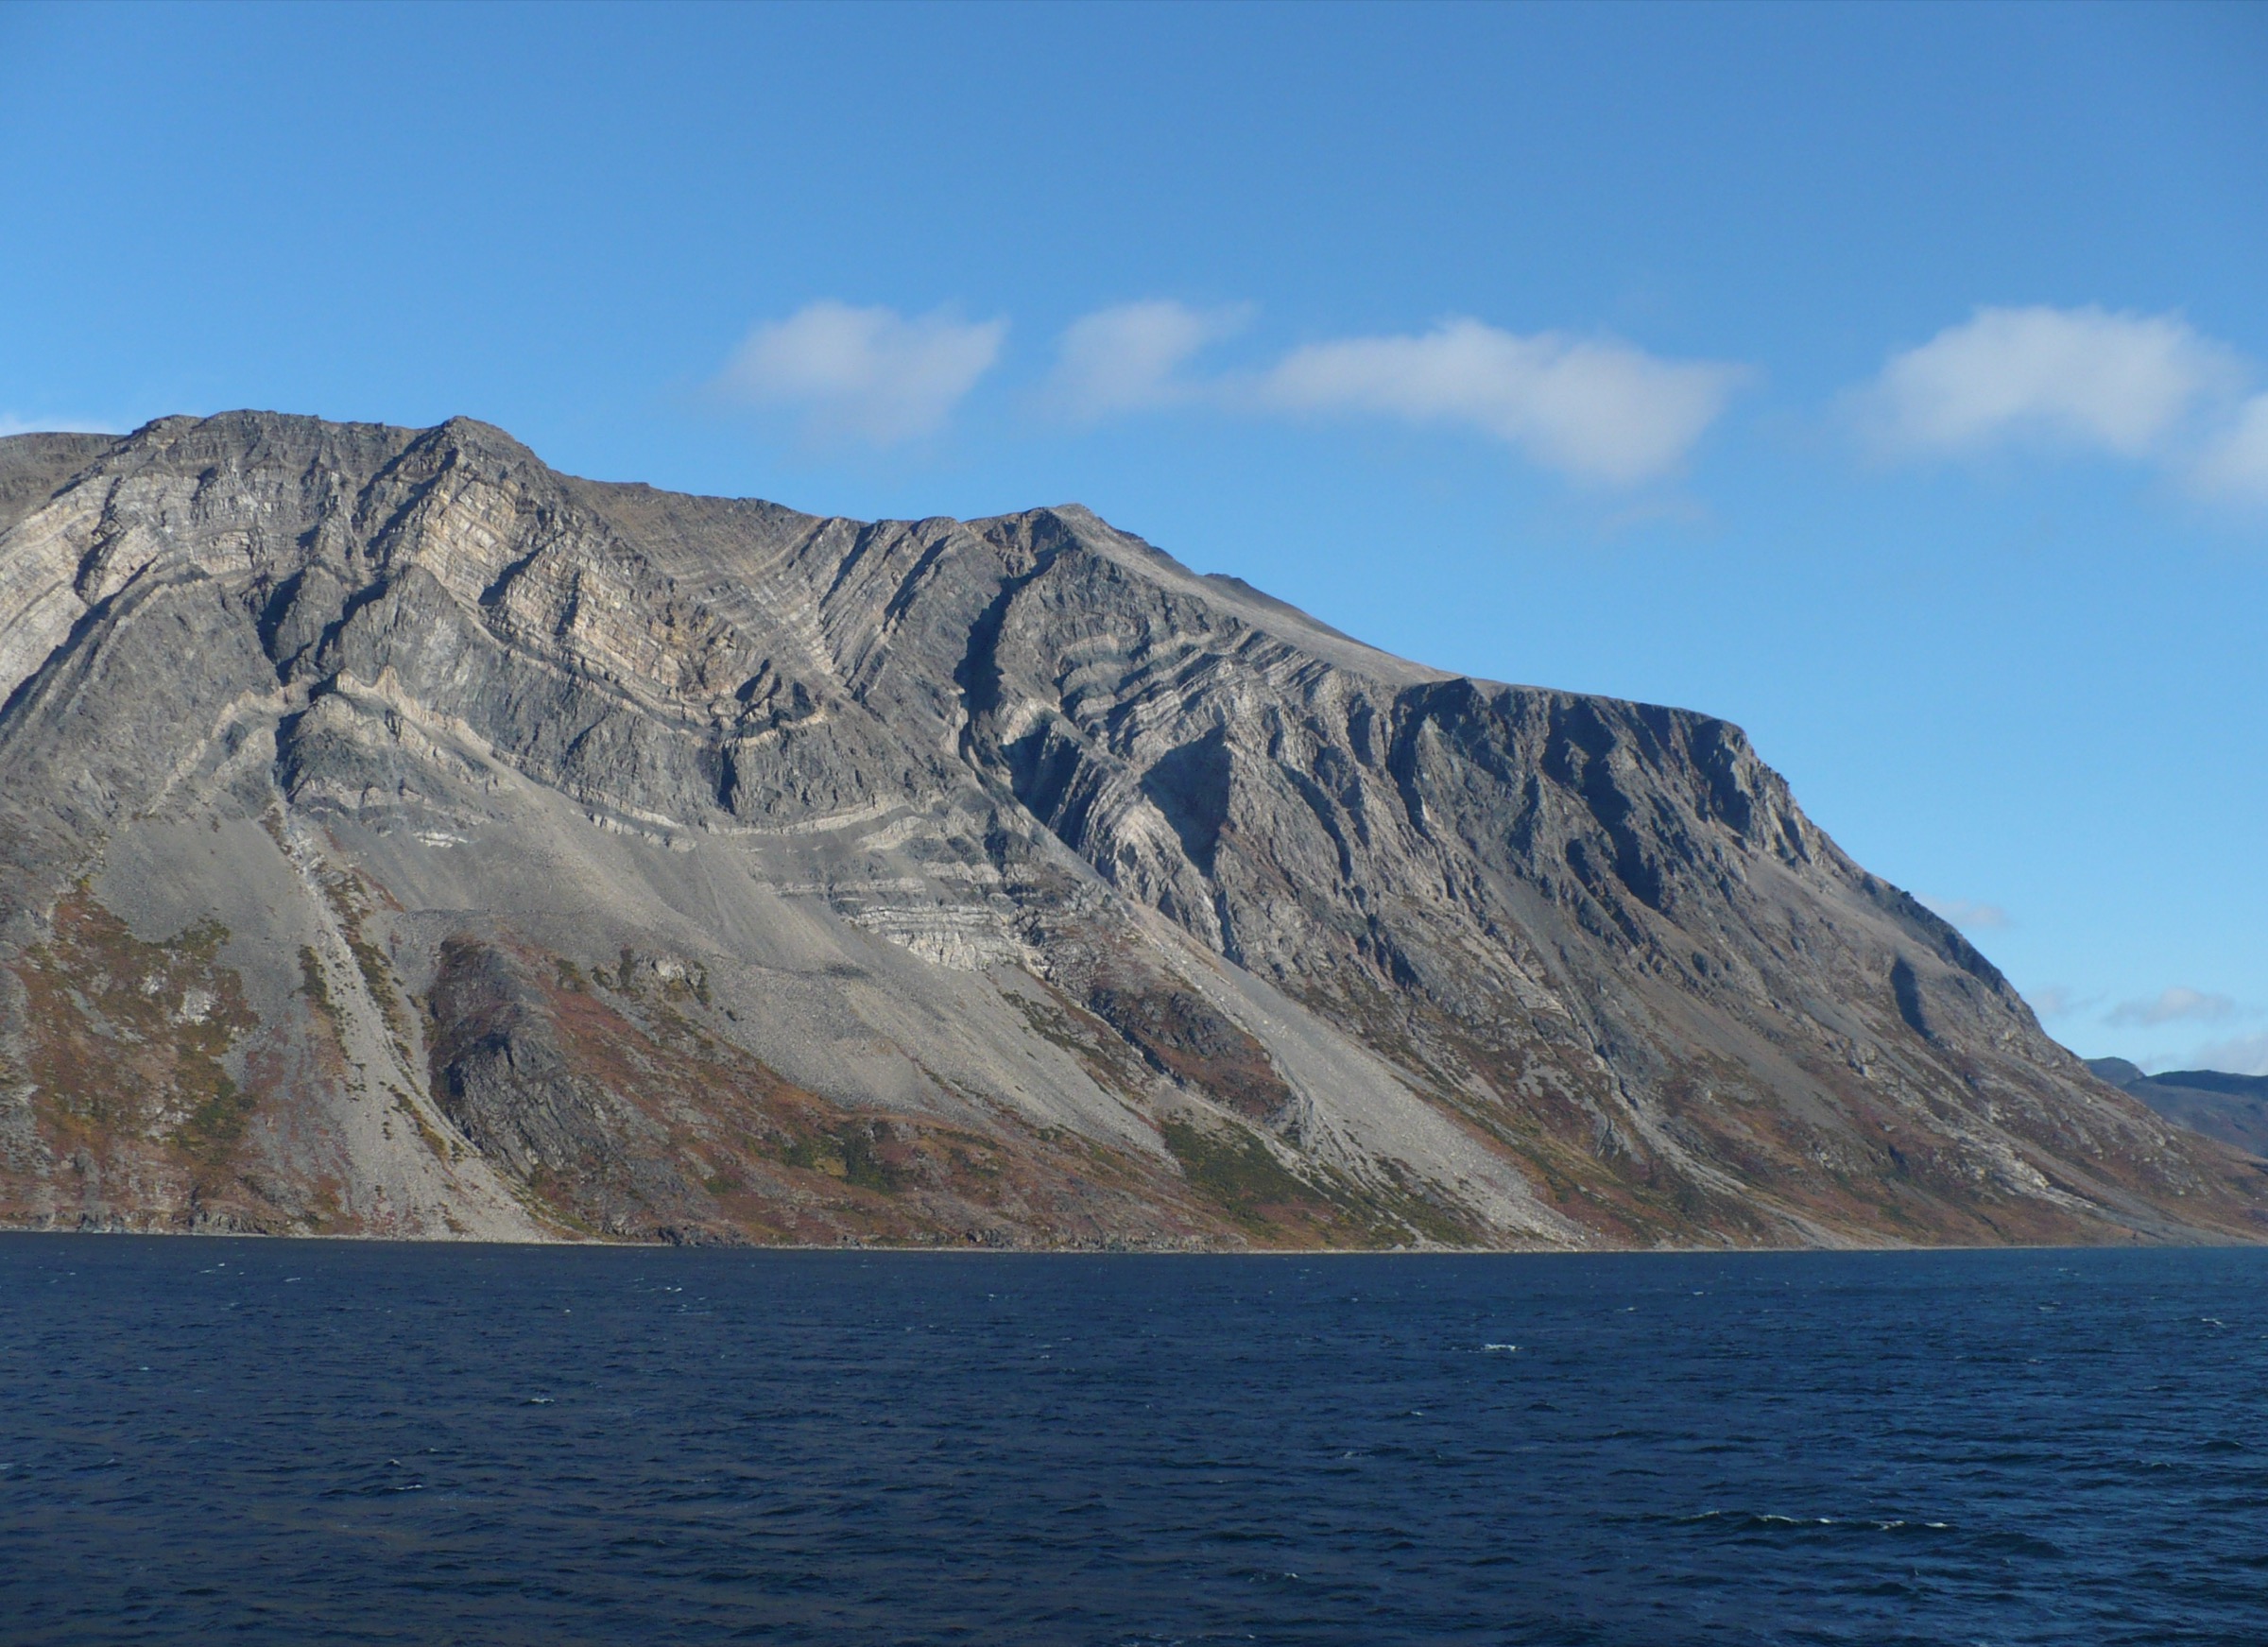
From a landing at Saglek Bay near the airstrip, the walking line follows the south shore of the fjord eastward over rocky beach, low tundra benches, and short rises onto a shoulder with views back into the fjord and south toward the Kaumajet. The route turns back at the chosen high point. The whole walk is off-track, on Precambrian-shield bedrock with thin tundra cover.
Why it is essential
Saglek Fjord is the standard fly-in gateway for any Kaumajet expedition and the southern boundary of Torngat Mountains National Park; the south-shore walk gives a low-stakes acclimatisation day before pushing south to the Kaumajet proper. The geological folding visible in the fjord walls is among the most dramatic in the Canadian Shield.
Equipment
- Stiff hiking boots
- Wind- and waterproof shell
- Insulation layer plus spare gloves and hat
- Bear-deterrent spray (polar and black bear are both possible)
- Bug net and DEET
- Map, compass, GPS, satellite messenger
- 2 litres of water
Hazards and notes
- Polar bears active on the coast year-round; never walk alone, carry deterrent and ideally a firearm under a guide
- Pack ice may persist into mid-July
- Saglek airstrip is a military facility; visitors are screened
- Trip registration with Parks Canada (Torngat office in Nain) recommended even for the south-shore walk
- Weather closes flying windows quickly; carry buffer days
GPX / KML links
No open route file located. Saglek Fjord mouth approximately 58.50°N, 62.45°W.
External links
2. Brave Mountain summit attempt (Grimmington Island)
Snapshot
Itinerary
From a leeward landing on Grimmington Island the line climbs through coastal scrub onto open scree slopes, gains the south-west shoulder of Brave Mountain, and follows the broad upper ridge to the summit. The reference climbing literature describes the ascent as a class 3 scramble in good conditions; verification on the ground is essential and a rope is prudent. Descent retraces the ascent route.
Why it is essential
Brave Mountain is the highest island peak on the Atlantic coast of North America between the Caribbean and Hudson Strait, and the headline summit of the Kaumajet. The view from the summit takes in the full Arctic Cordillera range south through the Kiglapait and north into Torngat, the Labrador Sea, and on a clear day the icebergs of the Labrador current.
Equipment
- Mountaineering boots
- Helmet (loose rock on upper sections)
- 30 m rope and minimum hardware for the upper ridge if class 4 is encountered
- Full waterproof and insulation layers
- Bivvy bag (in case of cloud benightment)
- Bear deterrent
- Map, compass, GPS, satellite messenger
- 3 litres of water (no source above the lower slopes)
Hazards and notes
- Polar bears on the coast and during the approach
- Sea-fog can engulf the summit ridge in minutes
- Boat pickup is weather-dependent; carry buffer days
- This is mountaineering terrain; a competent climbing partner and qualified Labrador-coast guide are mandatory
- Trip registration with the Nunatsiavut Government and Parks Canada (Torngat office) is recommended
GPX / KML links
No open route file located. Brave Mountain approximately 57.86°N, 61.97°W.
External links
3. Bishop’s Mitre col walk
Snapshot
Itinerary
From a landing in Seal Bight or Cod Bag Harbour, the walking line climbs the broad gully system between Brave Mountain and Bishop’s Mitre on open tundra and scree, reaching the col at about 900 m. The col gives the closest near-summit view of Bishop’s Mitre’s distinctive river-carved cleft (the feature that gives the mountain its name) without committing to the class 3 scramble of the Mitre summit itself. Descent retraces the ascent route.
Why it is essential
The col is the only walking-grade vantage point at altitude in the Kaumajet and the safest place to study Bishop’s Mitre — one of the most striking rock features on the entire Labrador coast — at close range. The route also opens views west into the interior plateau of Grimmington Island.
Equipment
- Stiff hiking or mountaineering boots
- Helmet
- Full waterproof and insulation layers
- Bear deterrent
- Map, compass, GPS, satellite messenger
- 3 litres of water
- Bivvy bag
Hazards and notes
- Polar bear risk on the coastal approach
- Loose rock on the upper gully
- Sea-fog can close in fast
- Boat pickup is weather-dependent
- Qualified guide strongly recommended
GPX / KML links
No open route file located. Bishop’s Mitre at approximately 57.90°N, 61.98°W.
External links
4. Hebron Fiord south-shore walk
Snapshot
Itinerary
From a landing on the south shore of Hebron Fiord — the long fjord that separates the Kaumajet from the Torngat foothills to the north — the walking line follows the shore east on rock and beach, climbing a low shoulder for views back across the fjord to the abandoned Hebron Mission National Historic Site, and continuing along the shore until a turn-around at a chosen headland. The route is off-track and stays within the polar-bear safety perimeter of the landing.
Why it is essential
Hebron Fiord is the only practical approach to the Kaumajet from the north, and the south-shore walk gives the closest accessible view of the abandoned Hebron Moravian Mission, designated a National Historic Site of Canada in 1976. The fjord wall above the walking line is the northern face of the Kaumajet block and shows the same ice-scoured Arctic Cordillera bedrock as the rest of the range.
Equipment
- Stiff hiking boots
- Wind- and waterproof shell
- Insulation layer
- Bear-deterrent spray; firearm under guide
- Bug net and DEET
- Map, compass, GPS, satellite messenger
- 2 litres of water
Hazards and notes
- Polar bears regularly cross Hebron Fiord; never walk alone
- Boat pickup is weather-dependent
- Hebron Mission across the fjord is a sensitive cultural site — respect signage and Inuit guidance on visits
- Sea-fog and katabatic winds typical of north Labrador fjords
GPX / KML links
No open route file located. Hebron Fiord mouth approximately 58.20°N, 62.55°W.
External links
5. Cod Island peaks viewpoint walk
Snapshot
Itinerary
Cod Island is the southern outlier of the Kaumajet, separated from Grimmington Island by Mugford Tickle. From a landing on the leeward shore, the walking line climbs the open lower slopes through coastal scrub and onto tundra benches, gaining a shoulder at about 600 m with views back to the Bishop’s Mitre and Brave Mountain block to the north and out over Mugford Tickle to the south. The route is off-track and turns back at the chosen high point.
Why it is essential
Cod Island is the southernmost summit cluster of the Kaumajet and the natural viewpoint for the rest of the range. The view north over the strait toward Bishop’s Mitre is among the most striking on the Labrador coast.
Equipment
- Stiff hiking boots
- Wind- and waterproof shell
- Insulation layer
- Bear-deterrent spray
- Map, compass, GPS, satellite messenger
- 2 litres of water
Hazards and notes
- Polar bear risk on the coast
- Pack ice in Mugford Tickle can persist into July
- Sea-fog can close in quickly
- Boat pickup weather-dependent
- Cod Island is a sensitive Inuit cultural-use area; consult the Nunatsiavut Government on visits
GPX / KML links
No open route file located. Cod Island approximately 57.75°N, 61.95°W.